

a birthday cake for Amy
/
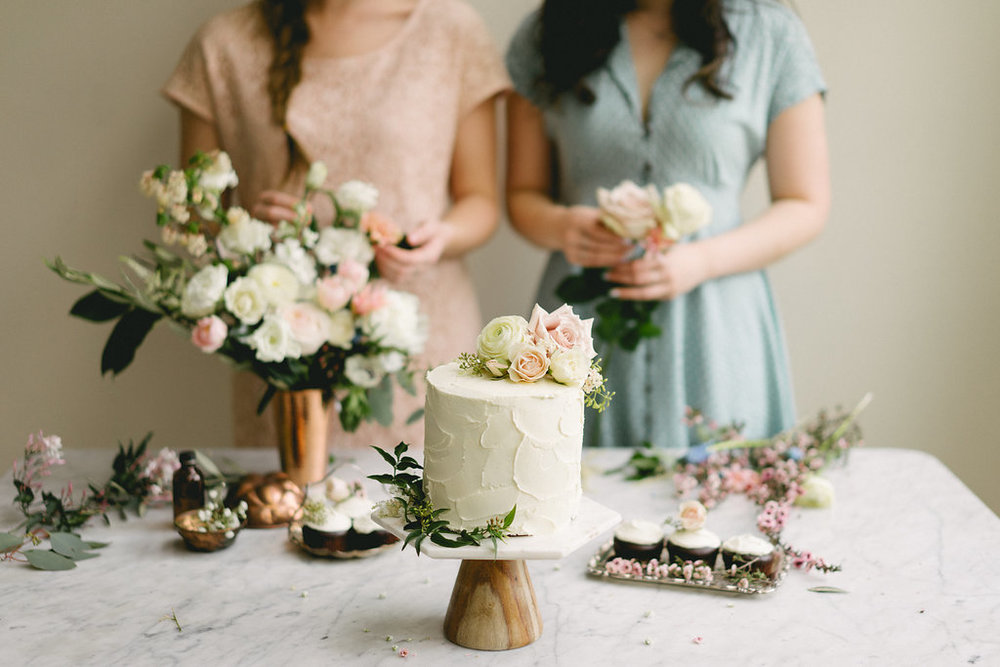


Oh hi there! I am so so excited to share my latest collab with my square....Amy & Victor! You might remember our epic Earl Grey Lavender situation from last year, our carnival cake, or even our orchard shoot!
This time we got together just before Amy's birthday! It was requested that I bake her a birthday cake (*cough cough - announced on instagram I do believe :P), so I decided to stick with my tried and true, and favourite ever, chocolate cake. I made the most delicious vanilla swiss meringue buttercream for on top, AND.....I contacted Celsia Floral to see if they'd be interested in collab-ing with us to make Amy's birthday shoot extra special. They said YES and came up with the most beautiful, whimsical bouquet ever for our shoot, with extra blooms for on top of the cake! The flowers almost stole the show, and all 3 of us were obsessed with them all morning. It is so fun to connect with other local creatives, and we hope to work together again soon!
It was so great to work with Victor again too (all photos are his!), and the squad was finally reunited.


Anyhow, Amy and I had the best weekend. We decorated and shot this cake, went out for the dreamiest food at the loveliest little French restaurant (Au Comptoir!) in the heart of Kitsilano, and then ended our evening at Beauty & the Beast. We also maybe went into the wrong theater for our movie....which is hilarious now, but a little traumatizing at the time. Ha! It's always an adventure with Amy. The next morning we ended our time together by brunching at Le Marche St George, like always. Pretty much a perfect weekend celebrating the birthday girl! It made me grateful all over again for our friendship, and to have someone who loves and appreciates so many of the same things in life - and doesn't judge you for taking photos of food in restaurants (or for standing on chairs to get the best shot....hehehe).
Chocolate Cake
yields: three 6-inch round pans, or a 9x13 pan
recipe: (adapted from Our Treasured Recipes by Central Heights MB Church)
ingredients:
3 cups Flour
2 cups Sugar
2 tsp Baking Soda
1 tsp Salt
2/3 cup Cocoa
1 TBSP Vanilla
2 TBSP Vinegar
3/4 cup butter (melted) *can substitute oil here if you want to make it vegan*
2 cups Warm Water
Directions
1) Mix together all dry ingredients; then pour all wet ingredients over top and mix until moist.
2) Pour batter into three 6-inch round pans (or a 9x13).
3) Bake at 350: for 30-35 minutes for [or until a toothpick comes out clean], slightly longer if using a 9x13 pan.
Vanilla Swiss Meringue Buttercream
recipe slightly adapted from: Style Sweet Ca
Ingredients:
1/2 cup egg whites (from about 3 to 4 large eggs)
1 cup granulated sugar
1 1/2 cups butter, at room temperature, cubed
1 1/2 teaspoons pure vanilla extract - *use the clear stuff if you want to keep your icing super white!
Directions
1) Fill a large sauce pan with a few inches of water and bring to a gentle boil. Place a mixing bowl on top to create a double boiler. Make sure that the water does not touch the bottom of the bowl!
2) Place sugar and egg whites into the mixing bowl, and whisk together. Keep mixing as the mixture heats, until it reaches 160 degrees F on a candy thermometer. This ensures that your egg whites are cooked and safe to eat! The sugar should also be completely dissolved and not grainy at all.
3) Remove from heat once 160 degrees F is reached, and mix on high for 5-10 minutes. This creates the meringue, which should be white, shiny, and hold medium stiff peaks.
4) Add in the butter one cube at a time, mixing thoroughly after each addition. *Make sure butter is at room temperature or it won't incorporate properly.
5) Mix in vanilla extract.
6) Turn up beater speed, and mix until it's nice and smooth. Use immediately to ice your cake, or place in the fridge to store.
*If your icing turned soupy at any point either: place in the fridge for 5 minutes and try again, as your butter may have been too soft; OR: just keep mixing! This icing can be a bit finicky, so don't panic.
ALSO. Victor took some sneaky video clips which Amy and I were completely unaware of...HAHA. He made my dorky white girl dance moves look a little less dorky. Right? You can also see how dreamy the swiss meringue buttercream is! Hurrah!
Happy Cake Baking!
-Kelsey


