apple caramel crumble pie

applecaramelcrumble_thefarmersdaughter-13.jpg
applecaramelcrumble_thefarmersdaughter-28.jpg

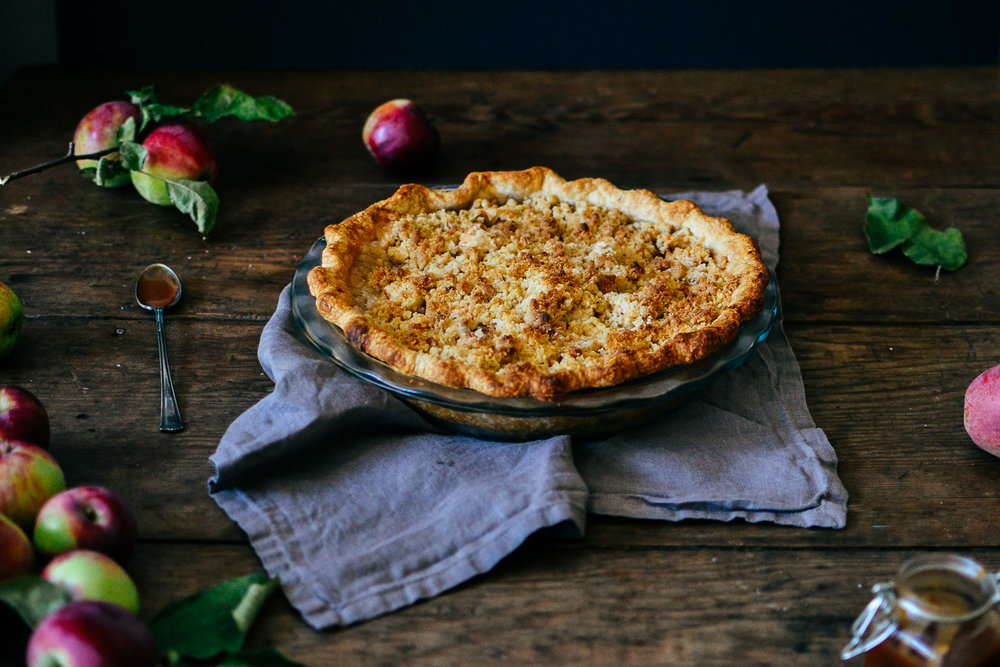
Today we're talking about pie and salted caramel.  Pie.  Salted Caramel.  Two of my favourite things.  

Seriously though, when asked my top 3 favourite foods....salted caramel makes the cut.  #noregrets

I debated whether or not to put the caramel right into the pie, but wasn't sure how it would cook (anyone have any tips for this?).  I decided to leave it on the side, and will revisit caramel IN a pie at a later date.  Maybe I just wanted to keep it in a jar on the side so that I could drizzle an inappropriate amount on my piece of pie, as well as ice cream the next day, apple slices during the week, and anything else I could think of.  Ha!

You'll also notice that this pie has a crumb topping.  I love the double crust just like any other sane person, but sometimes I just want those crumbs!  I feel like this pie is the perfect marriage of your classic apple pie and apple crisp.  Also, it's less work than rolling out a top and obsessing about getting your crimps/braids/cut outs just right.  That's a win win in my book!


Apple Caramel Crumble Pie

ingredients:

Pastry - recipe from Jean Pare
Yields: enough for 4 double crust pies

5 cups Flour

2 tsp Salt

1 tsp Baking Powder

3 tbsp Brown Sugar

1 lb Lard (or vegetable shortening)

1 Egg

2 tbsp Vinegar

Cold water

directions:

1)  Mix together flour, salt, baking powder and brown sugar in a large bowl.

2)  Cut up lard and add to dry ingredients. 

3)  Using a pastry cutter (or a plain old fork works as well), cut in lard until your mixture is crumbly.

4)  Break your egg into a liquid measuring cup and beat well.

5)  Add vinegar to the measuring cup.

6)  Add very cold water to the measuring cup, until the mixture measures to 1 cup.

7)  Pour liquid mixture over flour mixture slowly, and stir.

8)  Use your hands to work the mixture together until it no longer crumbles apart.  This is where experience will come in, as you don't want to overmix the dough!  Once you make it a couple of times, you'll get the feel of it.

9)  Divide into 4 equal parts.  Each part will make one pie, so you can choose to use it all at once, store some of the dough in the fridge* for up to 2 weeks, or pop some of into the freezer for later!

*If you do refrigerate your dough overnight (or for a few days), be sure to take it out at least an hour before you roll out it (maybe less if it's super warm in your house).  Otherwise it will be too stiff!


assembly:

1)  Once your pie dough is ready, you can peel and chop apples (the exact number will depend on the size of your apples, and how full you want to make your pie).  We used Elstar apples, which are nice and tart, and are wonderful for baking with!

2)  Mix all ingredients in with your diced apples, stir, and let sit for a few minutes.

3)  Take approximately an eighth of your dough, and roll it out in a circle.  You want your dough circle to be big enough to cover the bottom of your pie plate, and to cover the outside edge at least a half an inch.

4)  Add your apple mixture to the pie plate.

5)  For Crumbs:  Mix together flour, brown sugar and salt.  Pour melted butter over and stir together.  Sprinkle crumb mixture evenly over top.

6)  Bake at 425 degrees for the first 15 minutes, and then reduce heat to 350 degrees for 30-40 minutes until nice and bubbly.  

*Check on your pie while it's baking, and cover with tin foil if your crumbs start to get too dark.

7)  I drizzled a generous helping of salted caramel over each piece of pie as I served them!

Crumbs
from: epicurious - Melissa Burns

3/4 cup flour 

3 tablespoons brown sugar

1/4 tsp salt

1/4 cup + 1 tablespoon butter, melted

Filling

6ish medium Elstar apples (or any tart apple of your choice)

1 tsp Cinnamon

1/4 cup Flour

3/4 cup Sugar


Salted Caramel Sauce

ingredients:

1 cup sugar

1/2 cup whipping cream

1/4 tbsp butter

1/2 tsp salt

directions:

In a medium saucepan, heat sugar on medium high heat until it starts melting, stirring occasionally.  Once there are no more white bits of sugar, or chunks, stop stirring, and let sugar turn a dark amber.

Immediately add in the butter, and stir until incorporated.  Add in the heavy whipping cream and salt, and again stir until incorporated. *Be careful in these steps as the mixture will froth quite violently!

Remove from heat, and let the caramel sauce cool and thicken before serving.  Store in the fridge in an airtight container!


Also, this was the last pie I made...way back in September.  Need to fix that ASAP!!!

Happy Pie-Making!

-Kelsey

apple crisp

It's officially October!  How in the world did that happen?

In case you didn't know, I work on an apple and pumpkin farm owned by my parents, so Fall is our busy (BUSY) season for sure.  It's still my favourite season, despite the chaos that is our constant companion throughout September and October.  

We're open 7 days a week, and forever picking produce, restocking everything, animal wrangling (I'm looking at you sneaky goat babies!), sharing our knowledge and advice with customers, and much much more!  Which doesn't leave much time for me to bake (much less photograph!), especially now that the sun is setting earlier and earlier each day.

Every year I tell myself that I'll get a headstart on Fall baking in the summer.  And every year it just doesn't quite happen.  Especially since we've been opening early into August as our early Springs have meant early harvest times.

Anyway, my mind is full to the brim with Fall baking ideas, and alas, I likely won't be able to share them all with you.  Or maybe I will in Winter.  Ha!

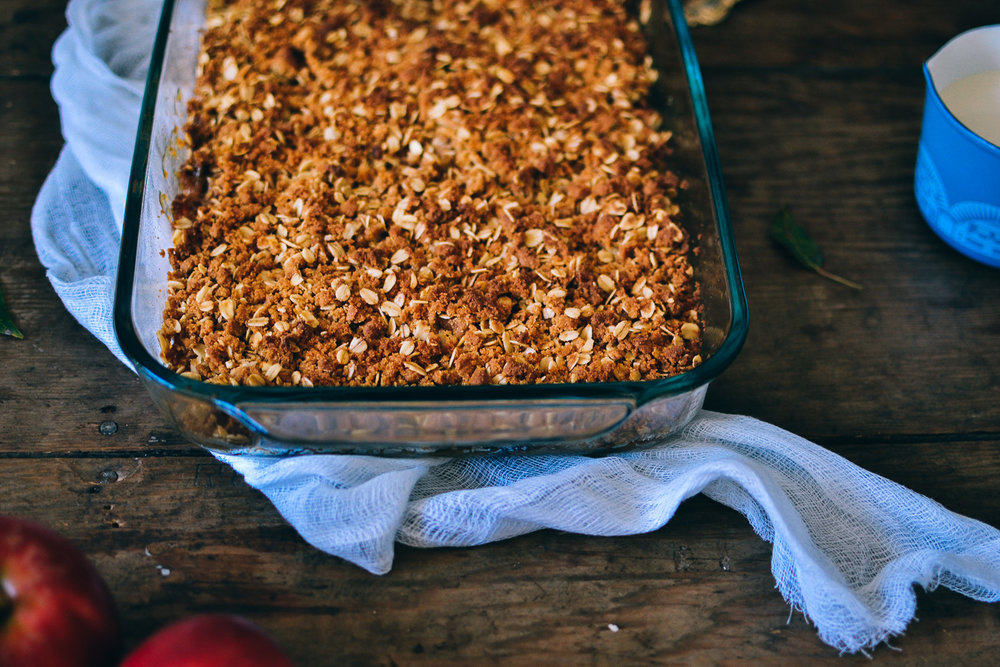
Today however, we're talking about apple crisp!  Or as some would call it, apple crumble!

Simple and delicious.  Just the way I like it.  An apple filling topped with delicious oat-y crumbs.  And always served warm with ice cream.


Apple Crisp

yields: one 9x13 pan

directions:

Fruit Layer:
1) Mix together chopped apples, cinnamon and flour.  Place in a greased 9x13 pan.

Crumb Topping Layer:
1) In a medium bowl, mix together the flour and baking powder.

2) Then, cut in cold butter with a pastry cutter or a fork until the mixture resembles coarse crumbs.  (Alternatively, I've tried melting my butter completely, and it results in very even, delicious crumbs...although they're a slightly different texture than when the butter was cold.  Both ways are delicious!)

3) Stir in brown sugar and oats.

4) Sprinkle crumbs over fruit evenly.

5)  Bake at 350 degrees for 40-50 minutes, or until the top is lightly browned and the apple pieces are tender.   Cook time will depend on how big your apple chunks are....so just keep checking it!

Tip: If your crumbs are brown, but your apples are still crunchy, just loosely place a piece of tinfoil on top of the pan to keep the crumbs from getting any browner while it cooks a bit longer!

ingredients:

8-10 cups chopped, tart apples (I used Elstar, but Granny Smith or something similar is a good choice!)

2 tsp flour

1 tsp cinnamon

1 cup flour

2 tsp baking powder

1/2 tsp salt

1/2 cup butter

1 cup brown sugar

1 1/3 cup oats


Isn't that the sweetest enamel measuring cup?  It's from Farminista, where I share the occasional outfit post and recipe!  I always love when pieces are both cute and funcitonal.

applecrisp_web_thefarmersdaughter-15.jpg

And yes...if you've stumbled across an old recipe for apple crisp in my archives, you'll know that I blogged this recipe 3 years ago!  I thought it was due for an update: both the recipe and the photos!  

Happy baking!

-Kelsey

apple cider waffles with salted caramel drizzle

apple cider waffles with salted caramel drizzle

Given the choice between waffles and pancakes, I'll choose waffles every time.  I don't know if it's because I like that waffles are crunchier, or because filling each little pocket with syrup brings me an inappropriate amount of joy.....but they'll be my choice every time.  Sorry pancakes.  It's not you, it's me.

Read More

[baked] apple cider donuts

I've been seeing a lot of Fall bucket lists going around the interwebs these days, and sometimes they make me chuckle. I live on a pumpkin patch where I pick apples for my job, we make apple cider on a weekly basis, there are hayrides every day of the week, and picking corn is kind of like a boring version of a corn maze.  Sooo....I've definitely crossed off most things on these bucket lists without even trying!  It reminds me not to take things for granted, and every day I feel so blessed to live and work in such a cool place.

However, one of the things on my Fall baking bucket list was to make apple cider donuts!  I had never actually heard of such a thing until I came across a post on tumblr about them.  I was instantly intrigued, and thought they sounded like the epitome of a Fall dessert.  Warm, cozy, fluffy donuts with apple cider and cinnamon?  Perfection!  

My expectations were cautiously high for these donuts, and I wasn't disappointed!  I also quite successfully convinced myself that because they were baked donuts (and not deep-fried), they must be healthy for you.  Am I right?

Apple Cider Baked Donuts
adapted from: eat, live, run

yields: 11-12 donuts

Ingredients:

2 cups all purpose flour

3/4 cup brown sugar

1 1/2 tsp baking powder

1/4 tsp baking soda

1 tsp salt

2 tsp cinnamon

2 eggs

2 tbsp unsalted butter, softened

1/2 cup apple cider

1/4 cup buttermilk  [or 1/4 cup of milk with 1/2 tsp of vinegar....let stand for 5-10 minutes before using]

Topping:
2 tbsp butter, melted
1/4 cup brown sugar
1/4 cup white sugar
1 tbsp cinnamon (or to taste)

Directions:

1)  In a large bowl, mix together the flour, sugar, baking soda, baking powder, salt and cinnamon.

2)  In a smaller bowl, mix together the softened butter with the eggs until fluffy (doing this ensures that your butter doesn't re-solidify once the cold buttermilk and cider are added).  Add buttermilk and apple cider, and mix well.

3)  Pour wet ingredients into the dry, and stir until just blended.  Try not to overmix!

4)  Spread the batter into a greased donut pan.  I used a large spoon to drop the batter in, or placing your batter into a pastry bag to pipe into the pan makes the process nice and easy.  Fill each mold about 3/4 full.

5)  Bake at 350 degrees for 8-10 minutes, or until an inserted toothpick comes out clean. You may want to break open a test donut just to make sure the inside isn't gummy!

6)  For the topping: melt the butter in a bowl that will fit a donut inside it.  Then, dip each donut quickly into the butter, and then into the cinnamon sugar mixture.

*These are best on the first day, as they tend to get a bit soggy once you place them in a container.

Do you have your own version of a Fall bucket list?  I'd love to hear what's on them! 

-kels

tasty tuesday: apple streusel coffee cake

Coffee cakes are one of my favorite cakes.  Second only perhaps, to chocolate cake.  Depends on my mood I suppose.  And coffee cakes in Fall are just plain delightful.  There's something so cozy about them, and the fact that they usually contain cinnamon makes them even more wonderful.

This recipe came from my friend Rachel, and I am so in love with it.  You've got cinnamon, apples, and a streusel topping....what more could you ask for?  So much goodness.

Make this on a crisp Fall day, and serve with hot coffee!

Or hot chocolate, or milk, or whatever.  For those of us that aren't really into coffee...

Apple Streusel Coffee Cake

Ingredients:

2 tbsp white vinegar

1 3/4 cup milk

3/4 cup butter, softened

1 3/4 cups white sugar

2 large eggs

1 tsp vanilla

3 cups flour

2 tsp baking powder

1 tsp baking soda

1/4 tsp salt

2 medium cooking apples, peeled, cored and thinly sliced (I used elstars)

Streusel topping:

2/3 cup white sugar

1/2 cup flour

2 tsp cinnamon

1/4 cup butter, cold

Directions:

1)  In a large liquid measuring cup, combine milk and vinegar and let stand for 10 minutes to sour.

2)  Next, mix together streusel topping: Combine sugar, flour, and cinnamon together in a small bowl.  Cut in butter until you have coarse crumbs.  Set aside.

3)  Now you can start getting the cake batter ready.  Beat butter and sugar together in a large bowl until light and creamy.

4)  Add eggs, one at a time, beating well after each addition.

5)  Add vanilla and mix well.

6)  Combine flour, baking powder, baking soda and salt in a medium bowl.

7)  Add flour mixture to butter mixture in four additions, alternating with the milk mixture in three additions. (You want to start and end with adding the flour mixture).  Mix together until just combined.

8)  Spread about half the cake batter into a greased, 9x13 pan.  

9)  Place apple slices close together in a single layer over the batter, and then sprinkle with about half of the streusel topping over the apples.

10)  Spread the remaining batter over everything, and sprinkle the remaining streusel topping on top.

11)  Bake at 350 degree for 50-55 minutes, or until a toothpick comes out clean.

p.s.

 ♥ kelsey

tasty tuesday: apple crisp

Oh yes...more apple recipes!  It started with

pie

last week, and it's not going to stop for a long time.  

More apple, pumpkin, and squash recipes will be coming at you like crazy for the next few weeks.  What can I say?  We love Fall, and it helps when you live on an apple/pumpkin farm and have an endless supply of delicious fall fruit!

Crisps are definitely one of the easiest desserts in the world...and yet they're so dang delicous!  You just throw fruit in a pan, top it with crumbs, and bam...you have a mouthwatering creation on your hands.

Oh yeah...don't forget to add ice cream!

Apple Crisp

Ingredients:

8 cups chopped tart apples (we used Elstar)*

2 tsp flour

1 tsp cinnamon

3/4 cup flour

1 1/2 tsp baking powder

pinch of salt

1/3 cup butter (cold)

1 cup brown sugar

1 cup rolled quick cooking oats

Directions:

Fruit Layer:

1) Mix together chopped apples, cinnamon and flour.  Place in a greased 9x13 pan.

Crumb Topping Layer:

1) In a medium bowl, mix together the flour and baking powder.

2) Then, cut in cold butter with a pastry cutter or a fork until the mixture resembles coarse crumbs.

3) Stir in brown sugar and oats.

4) Sprinkle crumbs over fruit evenly.

Bake at 350 degrees for 40-50 minutes, or until the top is lightly browned and the apple pieces are tender.   Cook time will depend on how big your apple chunks are....so just keep checking it!

(If your crumbs are brown, but your apples are still crunchy, just loosely place a piece of tinfoil on top of the pan to keep the crumbs from getting any browner while it cooks a bit longer!)

Let us know if you have any suggestions for Fall treats!  We'd love to hear them.

p.s. 

 kelsey

tasty tuesday: apple pie

I'm really not sure why it's taken me so long to talk about pie here....especially since I live on an apple and berry farm, and my mom's known as the best pie-maker in town, and we seem to have pie in the house every other week in summer/fall.

It may have something to do with the fact that I don't actually like pie.  Ahem, yes you read that right.  I'm not a huge fan....and my friends do enjoy teasing me endlessly about it!  Because truly, who the heck doesn't like pie?   Whatevs.  

Anyways, I love making people happy...so if they want pie, I will give them pie!

My mama helped me out with this post...so not only did it look good, but it tasted amazing as well (or so I've been told...haha).  I believe her two main tips for a deliciously flaky crust are: don't overmix your dough, and be sure to chill your dough for 20-30 minutes!


Apple Pie

Pastry recipe from: Company's Coming - Desserts
(Yields enough pastry for 4 pies)

Ingredients:

Pastry

5 cups Flour

2 tsp Salt

1 tsp Baking Powder

3 tbsp Brown Sugar

1 lb Lard (or vegetable shortening)

1 Egg

2 tbsp Vinegar

Cold water


Pie filling:

Ingredients:

6ish medium Elstar apples (or any tart apple of your choice)

1 tsp Cinnamon

1/4 cup Flour

3/4 cup Sugar

Directions:

1)  Mix together flour, salt, baking powder and brown sugar in a large bowl.

2)  Cut up lard and add to dry ingredients. 

3)  Using a pastry cutter (or a plain old fork works as well), cut in lard until your mixture is crumbly.

4)  Break your egg into a liquid measuring cup and beat well.

5)  Add vinegar to the measuring cup.

6)  Add very cold water to the measuring cup, until the mixture measures to 1 cup.

7)  Pour liquid mixture over flour mixture slowly, and stir.

8)  Use your hands to work the mixture together until it no longer crumbles apart.  This is where experience will come in, as you don't want to overmix the dough!  Once you make it a couple of times, you'll get the feel of it.

9)  Divide into 4 equal parts.  Each part will make one pie, so you can choose to use it all at once, store some of the dough in the fridge* for up to 2 weeks, or pop some of into the freezer for later!

*If you do refrigerate your dough overnight (or for a few days), be sure to take it out at least an hour before you roll out it.  Otherwise it will be too stiff!

Directions:

1)  Once your pie dough is ready, you can peel and chop apples (the exact number will depend on the size of your apples, and how full you want to make your pie).  We used Elstar apples, which are nice and tart, and are wonderful for baking with!

2)  Mix all ingredients in with your diced apples, stir, and let sit for a few minutes.

3)  Take approximately an eighth of your dough, and roll it out in a circle.  You want your dough circle to be big enough to cover the bottom of your pie plate, and to cover the outside edge at least a half an inch.

4)  Add your apple mixture to the pie plate and roll out another dough circle for the top.

5)  Before adding the top of the crust, dip your fingers in a tiny bit of water, and run them along the edge of the bottom crust.  This will help the top adhere well to the bottom crust.

6)  Cover the pie with the top crust, trim any extra dough hanging over the side...leaving about a quarter of an inch over the pie plate.

7)  Pinch together the crusts, and fold inwards (this is so any juice that bubbles out won't end up in your oven).  Then, you can choose to crimp the edges however you like!

8)  Sprinkle the top lightly with sugar, poke several holes (for ventilation) in the top, and you're ready to go.

*If you want to be fancy, you can cut out shapes from the top crust (or from extra crust) to add decorations to your crust.  We added a few cute leaves to ours!

9)  Bake at 425 degrees for the first 15 minutes, and then reduce heat to 350 degrees for 30-40 minutes until nice and bubbly.


A handy trick to getting your bottom crust in it's pan easily is to drape it over your rolling pin, and then gently roll it over the pan!

It can be tough to get a nice crimp on the edges....so don't be discouraged!  Remember, practice makes perfect.

So that means, make more pie. Duh.

There you have it.  Easy as pie!

-kelsey